Smelly fryer? Here is How to Clean Power Air Fryer Oven at ease Power Air Fryer is like a magic machine! Why am I saying this?
It’s makes cooking convenient and healthy. It may not be that popular as any conventional toaster oven. But once you try it, there is no way of going back.
Wanna know the secret of making that crispy texture on an air fryer?
Just Clean it every time you’re done cooking with the fryer. Yep, you heard that right! The simple truth is, Air Fryer melts the bad fat and makes food crispier. And in this process, the magic machine endures a lot of fat dripping and buildups inside.
Wondering How to Clean Power Air Fryer Oven at easy?
No worry. I have rounded up the easiest ways & some air fryer cleaning hacks so that you can enjoy a healthy meal with the least cleaning chore. Ready?
Contents
- 1 How to Clean Power Air Fryer Oven: A Simple 5 Step Process for Deep Cleaning
- 1.1 Step 1: Start with the Dripping Tray
- 1.2 Step 2: Now the Air Flow Racks
- 1.3 Step 3: The door Needs a Wipe
- 1.4 But first a warning:
- 1.5 Step 4: Don’t forget to Clean the Interior
- 1.6 Here’s the most important part.
- 1.7 Let the inside dry property.
- 1.8 Step 5: Wipe the Exterior
- 1.9 Can I use oven cleaner on my air fryer?
- 1.10 Bonus: Air Fryer Maintenance and Cleaning Tips
- 2 Best Way To Clean Instant Air Fryer Oven
How to Clean Power Air Fryer Oven: A Simple 5 Step Process for Deep Cleaning
First and foremost, before jumping into the cleaning of the Fryer process, make sure the base unit is UNPLUGGED.
Step 1: Start with the Dripping Tray
The dripping tray is the part that endures the most in any Air Fryer. All the unwanted and bad fat drip on it to make the food crispier.
Naturally, the buildup will be a big one, and if you left it for a few days, it would turn into a burned residue. I am not a fan of dark spots on the dripping tray at all.
These build-ups not only make me feel disgusted but also create an awful odor on the food.
Are you having the same issue?
The solution is easier than you thought. Fill the sink with water and add a mild dish detergent to it.
Now make a foamy bath for the dripping tray and dip it in the sink. Leave the tray for 10 to 15-minutes so that the fat gets softened. Now wipe with a washcloth dipped in soap water.
As easy as it sounds
You will be surprised to see the shine on the tray. And, of course, no odor at all!
Step 2: Now the Air Flow Racks
The airflow racks may not endure that much like a dripping pan.
But.
All the tiny fat and food particles get onto those racks. So don’t get surprised if you find dark sticky deposits on the steel nets.
Like fat residue on the dripping tray, those buildups can turn the cooking experience into an odorous nightmare. Thus, you need to take them out immediately if the buildup is already there. It is easier to clean the racks like the pan. Wondering how?
You still have that dish detergent solution in the sink, aren’t you? Dip the racks on the solution and wait for 10 to 15-minutes.
What’s next?
Now take a washcloth and wipe the racks. One or two wipes should be enough. But if you are still not satisfied, put them under running water. The sparkle of the steel net will surely mesmerize you after each cleaning.
Step 3: The door Needs a Wipe
How would you feel to watch your food cooking inside the fryer through a smoky and dirty door?
Well, I won’t be comfortable at all, and I am sure you won’t be either. So, you’re not alone in facing the power air fryer oven door problems.
You can remove the door with a gentle press on the joints without forcing too much. Try Otherwise, the joints may break, and the fryer will be of no use.
But first a warning:
After you have removed the door, DO NOT dip it in WATER. And DON’T put the door under a stream of RUNNING WATER. It will be a hell of a task to dry off and remove water droplets trapped inside the door.
The best way of cleaning the door is just to wipe with a washcloth dipped in soap water.
Let the door dry off for 20 to 30-minutes.
Now wipe it with another dry cloth. It will remove any whitish water residue. These last wipes will make the transparent window shiny and clear. Now you can see the food getting crispier more clearly.
Isn’t it cool?
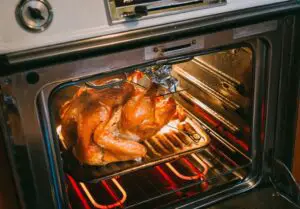
Step 4: Don’t forget to Clean the Interior
It’s time to focus on the interior of the air fryer. Like the pan or racks, the fryer’s metal interior of fryer face heat, fat, and dry food particles mixed in moisture. So, you can imagine how the outcome will look like.
So How do you clean the inside of an air fryer oven?
You will find greasy residue in almost every corner of the interior. Of course, these residues will ruin the cooking. But the worst is yet to come. If you left them for long, the buildups would start corroding the interior.
Here’s the most important part.
In the case of stainless steel, you may see a slow effect, but eventually, the fryer’s interior will become a dark-spotted mess with an awful smell.
Therefore, you need to act fast to clean the interior. Take a washcloth dipped in soapy water. Make sure you RINSE any excess water from the clothing.
Now wipe the interior with gentle pressure. If you are facing difficulties reaching the corners, use a soft brush instead.
Let the inside dry property.
I would recommend leaving the fryer open for faster drying. Lastly, wipe any excess water with dry clothing. Can you see or smell anything unpleasant inside? I can guarantee you can’t!
Step 5: Wipe the Exterior
All it has left now is the exterior of the Power Air Fryer. The outside of the fryer may seem least affected by the cooking, but there is a catch.
The 1700-watt heating source generated enough heat to warm up the exterior too. Now all the soft dirt and debris melted and stuck to the outer plastic shell.
Moreover, some of that dirt gets caught on the exhausts. If they are left like this, you may end up with a fryer with a power connection malfunction or overheating problem. Thus, you need to act quickly to avoid any of these.
Can I use oven cleaner on my air fryer?
Well, read the user manual first. It depends on the basket. Soft clothes dipped in soapy water can do the magic.
Take such a wet cloth and wipe the fryer’s exterior. By the way, don’t fort to TURN OFF the machine before any cleaning.
Bingo, we’re almost done!!!
Keep the fryer out in the air for quick drying. You can also wipe the fryer exterior with a dry microfiber cloth. It will remove any water droplets that may later turn into the whitish residue. This step is essential to remove any water residue on the surface.
Bonus: Air Fryer Maintenance and Cleaning Tips
- How to clean baked on grease from air fryer oven? Use napkins to remove excess fat from foods before putting them into the fryer
- Avoid putting watery substances inside the fryer
- Too many crumbs can turn the fryer dirty
- Unplug before any cleaning and maintenance
- Do not immerse the heating unit, and door in the water
- Bleach can cause severe damage both inside and outside of the fryer
- Avoid any harsh cleaning chemicals for cleaning the interior
Best Way To Clean Instant Air Fryer Oven
It’s All-New Again!!!!
You can put the fryer on the countertop and check. I am sure you won’t find anything that can make you feel down or disgusted. The fryer becomes new again like the way you bought it in the first place.
How often should you clean your air fryer?
I would say, every single time you use it. Keeping this magic machine is very easy. Just keep an eye on it, and don’t wait until it becomes too greasy.
As a die-hard fan of Air Fryer, I would recommend cleaning the machine at least once a week. You already know how to clean a power air fryer oven. So, it shouldn’t be a problem.
But cleaning after each use will be too much hassle, and you know it won’t be a feasible plan.
learn more: How To Clean Extractor Fan Motor
Oh, how to clean power xl air fryer?
The procedure is pretty the same. A clean and well-maintained air fryer will turn any food crispier and reduce the fat content. So, if you are conscious of your and the family’s health, it’s always better to switch to air frying.